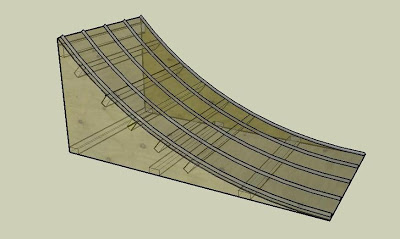
Skimboard Rail Building: Curved Kicker
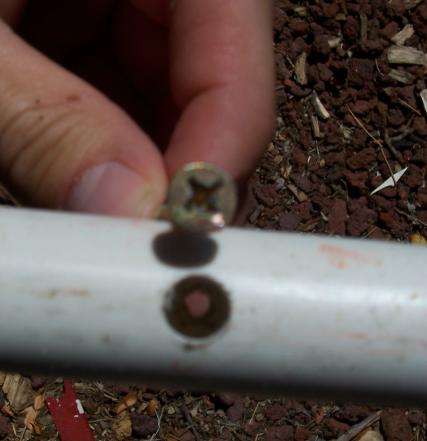
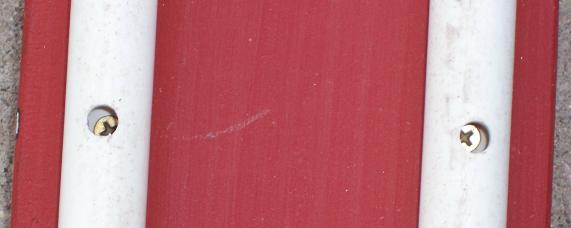
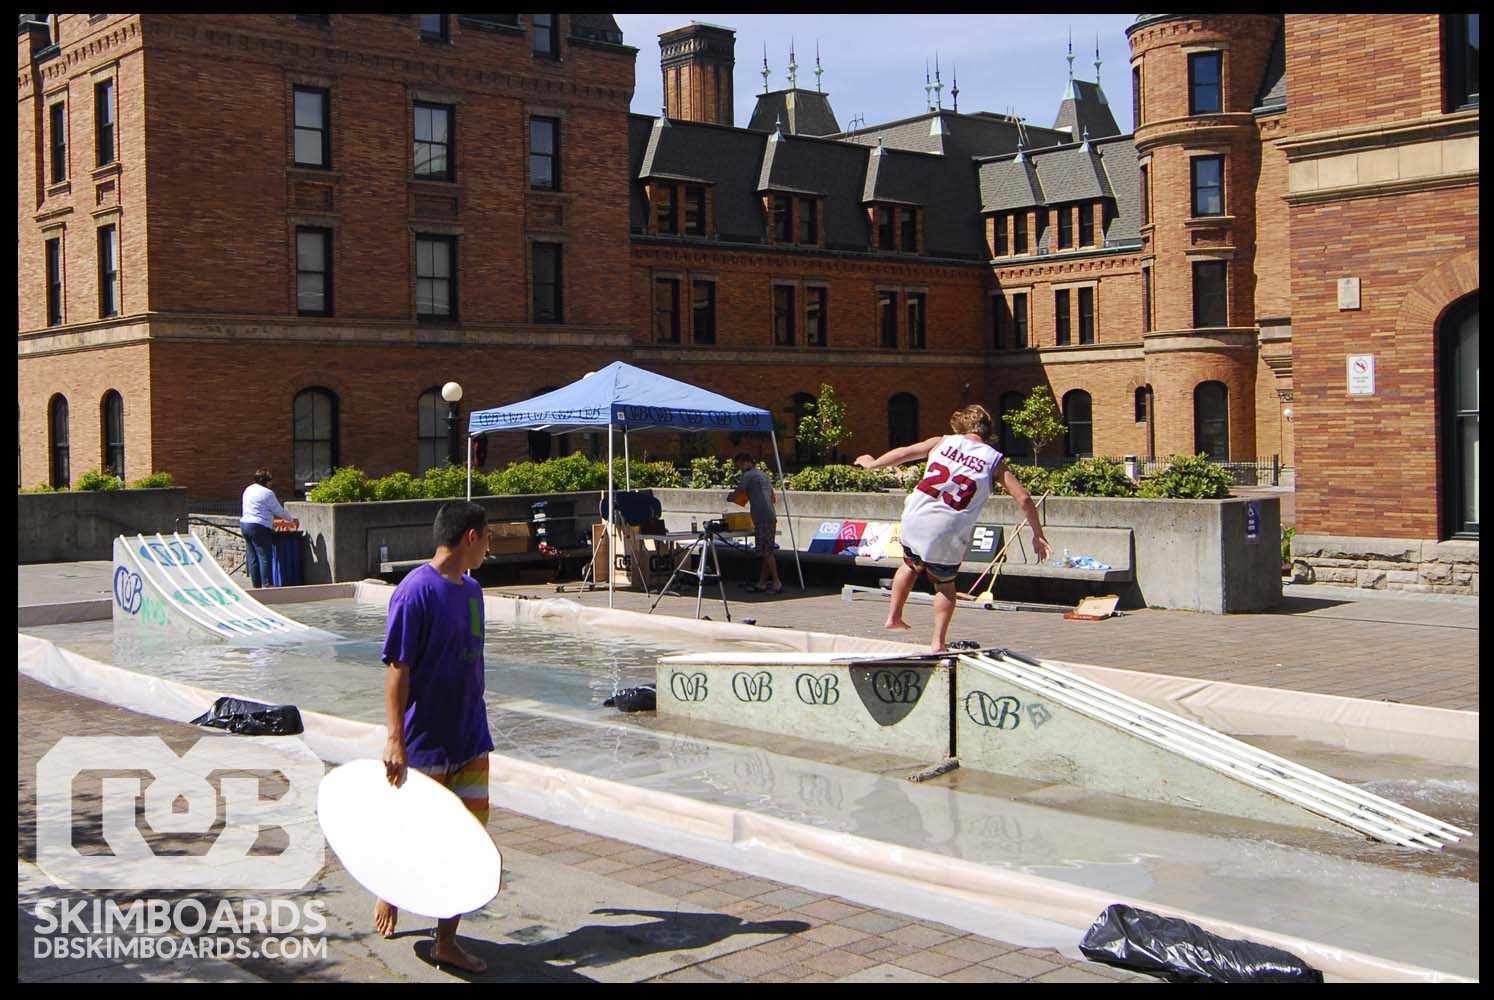
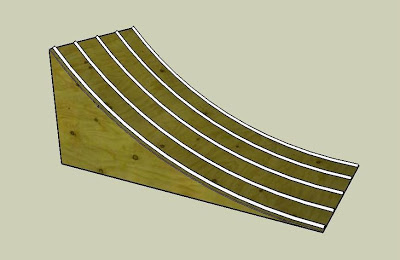
Ready for you and your skimboard to fly. Build a kicker. The main idea is that you cut out the sides of the kicker in the shape you want from plywood. You then use 2x4’s to connect the sides together and support the kicker. Cut out a rectangle that is the width of your kicker and the length of the top. Since the top of the kicker is curved, use a piece of string to measure the curved length. Attach the rectangle to the top of the kicker. Because it is curved, soaking the top rectangle piece of plywood in water for several hours will help it bend easier. If the curve is dramatic, use a thinner piece of plywood for the top (3/8” or 1/4" thick) for easier bending. Now attach the pvc. For help on attaching the pvc, see this post on skimboard rails.
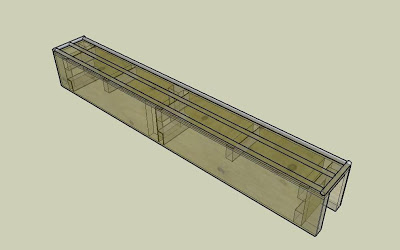
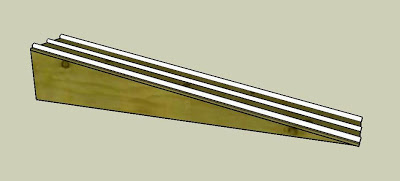
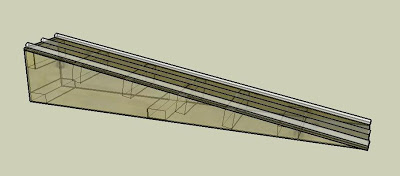
Skimboard Rail Building: Up Rail
Ready to build a skimboard rail? Here we go. The main idea is to cut out the sides of the skimboard rail in the shape you want from plywood. Use 2x4’s to connect the sides together and support the rail. Cut out a rectangle that is the width of your rail and the length of the top. Attach the rectangle to the top of the rail. Now attach the pvc. For help on attaching the pvc, see this post on skimboard rails .
The following 6’ x 1’ x 1’ up rail can be built from
1 – 4’x 8’x 1/2” piece of plywood ($12.33 each at Home Depot)
2 – 2”x 4”x 8’ ($1.68 each at Home Depot)
3 – 10’x 1/2” pvc pipes ($1.43 each at Home Depot)
Total Cost = $19.98 (You will still need to purchase some screws to get it all put together)

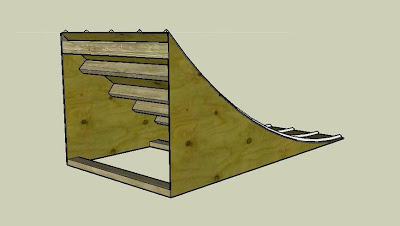
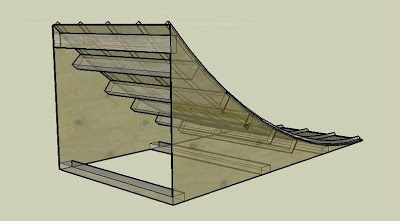
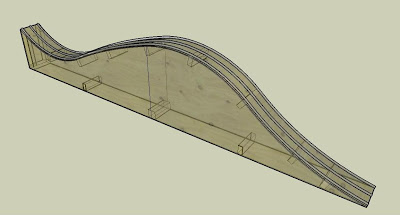
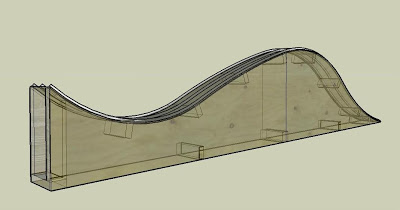
Skimboard Rail Building – Rollercoaster rail
Building a roller coaster rail for your skimboarding trip.
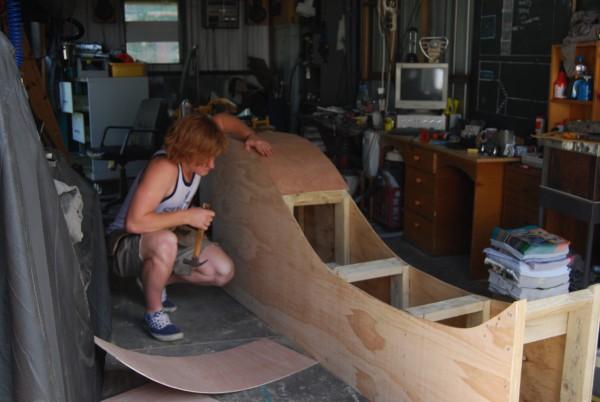
The main idea is that you cut out the sides of the skimboard rail in the shape you want from plywood. You then use 2x4’s to connect the sides together and support the rail. Cut out a rectangle that is the width of your rail and the length of the top. Since the top of the skimboard rail is curved, use a piece of string to measure the curved length. Attach the rectangle to the top of the rail. Because the top of the rail is curved, soaking the top rectangle piece of plywood in water for several hours will help it bend easier. You can also use a thinner piece of plywood for the top (3/8” or 1/4" thick) for easier bending. Now attach the pvc. For help on attaching the pvc, see this post on skimboard rails.
The main idea is that you cut out the sides of the skimboard rail in the shape you want from plywood. You then use 2x4’s to connect the sides together and support the rail. Cut out a rectangle that is the width of your rail and the length of the top. Since the top of the skimboard rail is curved, use a piece of string to measure the curved length. Attach the rectangle to the top of the rail. Because the top of the rail is curved, soaking the top rectangle piece of plywood in water for several hours will help it bend easier. You can also use a thinner piece of plywood for the top (3/8” or 1/4" thick) for easier bending. Now attach the pvc. For help on attaching the pvc, see this post on skimboard rails.


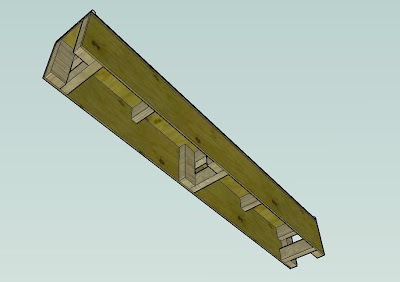
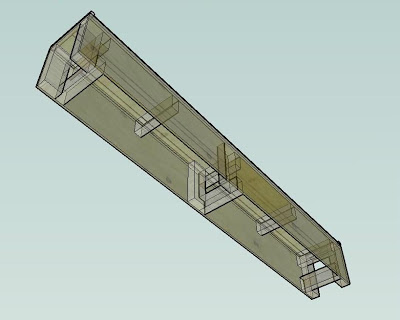
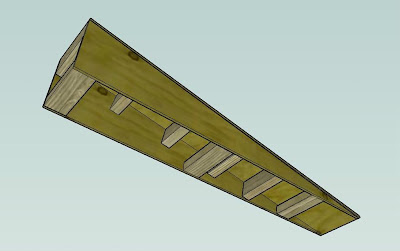
Skimboard Rail Building: Box Rail
This particular method is the way to make the most sturdy skimboard rails. It will also allow you to make many different shapes of rails. The draw backs are that the rails are not as portable or adjustable as other methods.
The main idea is that you cut out the sides of the rail in the shape you want from plywood. You then use 2x4’s to connect the sides together and support the skimboard rail. Cut out a rectangle that is the width of your rail and the length of the top. If the top of the rail is curved, use a piece of string to measure the curved length. Attach the rectangle to the top of the rail. If the top of the skimboard rail is curved, soaking the top rectangle piece of plywood in water for several hours will help it bend easier. If the curves are dramatic, use a thinner piece of plywood for the top (3/8” or 1/4" thick) for easier bending. Now attach the pvc. For help on attaching the pvc, see this post skimboard rails.
The following 8’ x 1’ x 1’ ollie on box rail can be built from
1 – 4’x 8’x 1/2” piece of plywood ($12.33 each at Home Depot)
2 – 2”x 4”x 8’ studs ($1.68 each at Home Depot)
3 – 10’x 1/2” pvc pipes ($1.43 each at Home Depot)
Total Cost = $19.98 (You will still need to purchase some screws to get it all put together)